How to Create A Gallery Wall That Tells Your Story
Have you ever stared at a blank wall and thought, “This could be amazing if I just knew where to start”? You’re not alone. Figuring out how to create a gallery wall can feel like solving one big, pretty-looking puzzle. But don’t worry! Whether your vibe is cozy and vintage or clean and modern, building a gallery wall is easier than it looks.
Think of your wall as a storybook. Every frame, photo, or piece of art is a chapter about you. Ready to tell your story?
Step 1: Gather Your Inspiration
Before you start to dive in, gather ideas. Browse Pinterest, scroll through Instagram, or flip through design magazines. Take note of anything that catches your eye.
One good trick is to create a mood board. Take screenshots of your favorite layouts and see what patterns pop up. Are you drawn to symmetrical rows or more free-flowing style clusters? This part is all about your personality, so don’t overthink it. Just collect whatever speaks to you!
Step 2: Choose a Theme (or Don’t!)
The truth is, not every gallery wall needs a theme. Some people love a clean “black frame, white matte” look, while others mix postcards, posters, mirrors, and random flea market finds.
If you’re the type who likes structure, pick a theme. It could be “travel memories,” “family moments,” or even just based on a specific color. If you like creative chaos, go for a mix! A personal drawing next to a vintage map next to a picture of your dog. The most important part is that it feels like you.
Step 3: Plan the Layout on the Floor
Before you hang anything, grab all your frames and lay them out on the floor. Move things around until you find a combo that clicks.
Here are three easy layout ideas for beginners:
The Grid: Perfect for symmetry lovers. Even spacing and matching frames give it a tidy, professional look.

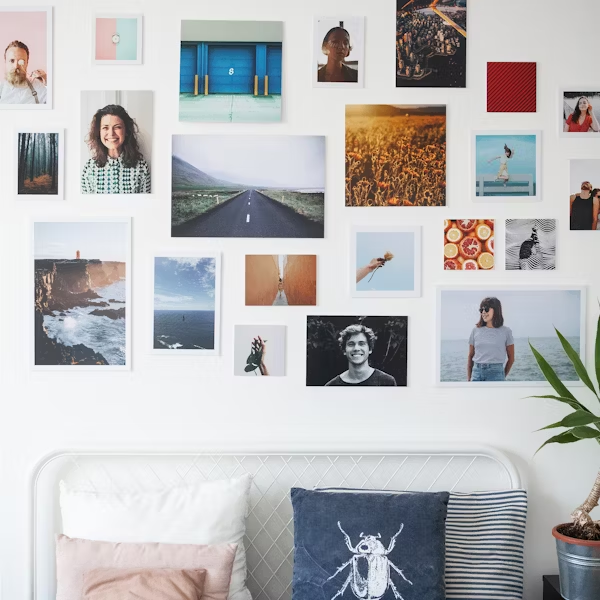
The Organic Cluster: One of my personal favorites; a looser layout that grows naturally outward without any particular organization.
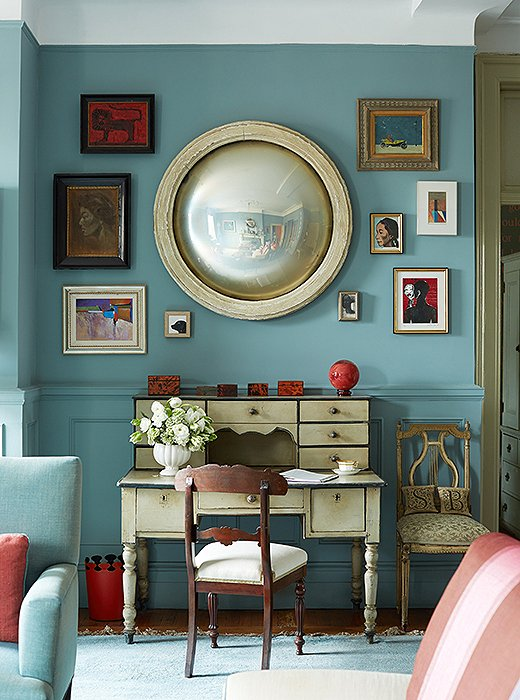
The Center Anchor: Start with one large piece in the middle, then build around it with smaller frames.
Pro Tip: Take a photo of your layout when it feels right. It’ll save you a ton of guesswork later.
Step 4: Get the Right Tools
You don’t need to be Bob the Builder to hang art, but you will need a few basics:
Hammer or drill
Nails or adhesive hooks / command strips / velcro hangers (great for renters!)
Painter’s tape
Level
Measuring tape
If you’re renting or scared of commitment, adhesive hooks, command strips, and velcro hangers are game changers. They’re strong, easy to remove, and won’t destroy your walls. I highly recommend them for your first time!
Step 5: Map It Out on the Wall
Use painter’s tape to map your layout directly onto the wall. Stick tape where each frame will go, then step back and look. Does it feel balanced? Too crowded? Too high? Adjust before you commit.
This step might feel tedious, but it’s the secret to that professional look.
Step 6: Hang with Confidence
Now for the fun part. Hanging! Start with your center or anchor piece and build outward. Check your level every couple of frames to keep things straight.
And if you mess up? Don’t worry, perfection is overrated anyway. Slightly uneven walls have personality, and that’s what makes a gallery wall special.
Step 7: Add Personality and Texture
Want to take it to the next level? Add something unexpected. Mix in a woven wall hanging, a mirror, or even a small shelf with a plant. Layers of texture make your wall feel alive.
You can also include 3D elements like a clock or a framed record. These touches add depth and surprise, which makes your wall more engaging to look at.
Step 8: Step Back and Enjoy Your Work
When you’ve finished hanging everything, take a step back and admire your work! You learned how to create a gallery wall, and now your space feels like a reflection of who you are.
Put on your favorite playlist, invite a friend over, and show off your work. They’ll be impressed, and you’ll know the truth; it took planning, creativity, and a little courage to make it happen.
Final Thoughts
Learning how to create a gallery wall is really about giving your space a voice. Every piece that you hang says something about who you are and what you love. So take your time, have fun, and let your wall evolve with you.
And if you’re staring at that blank space right now, maybe this is your sign to start. Time to start back at Step 1!
Ready to build your gallery wall?
Try our Gallery Wall Builder (coming soon!) to test out different layouts and frame sizing before you decorate.Don’t worry about sounding professional. Sound like you. There are over 1.5 billion websites out there, but your story is what’s going to separate this one from the rest. If you read the words back and don’t hear your own voice in your head, that’s a good sign you still have more work to do.
Be clear, be confident and don’t overthink it. The beauty of your story is that it’s going to continue to evolve and your site can evolve with it. Your goal should be to make it feel right for right now. Later will take care of itself. It always does.